In order for OVAI to push an interaction model to Dialogflow, it needs proper authority. These steps will walk you through how to provision a set of credentials for OVAI.
Prerequisites
- Only Dialogflow V2 API is supported at this time (V1 will deprecate Oct. 23rd, 2019)
Steps
Log into Dialogflow here.
Either create a new agent or select an existing agent. You can find a complete list of agents you have access to here.
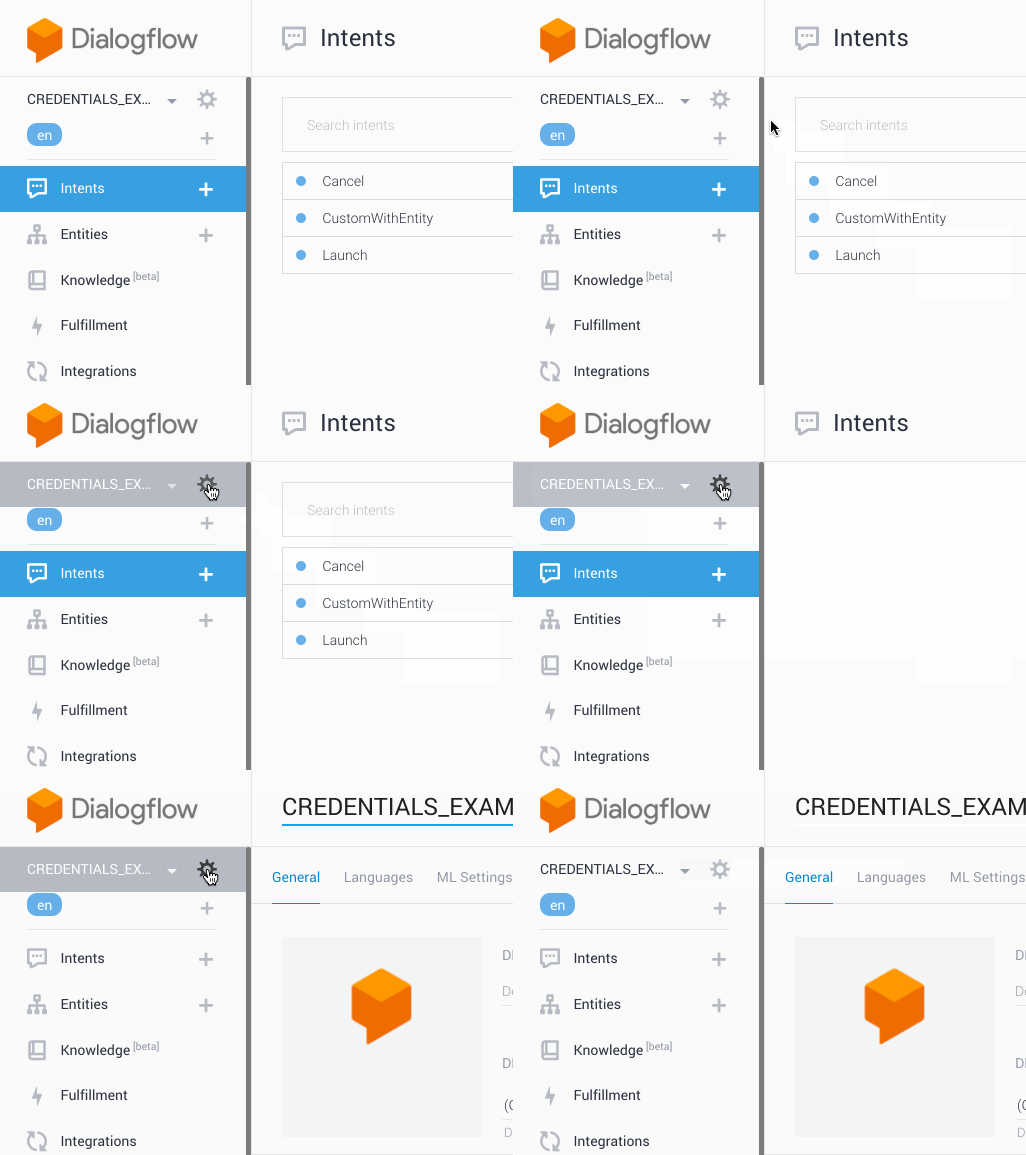
If not there already, navigate to the settings page for the agent by clicking the gear next to the name.
Click the email address for you service account.
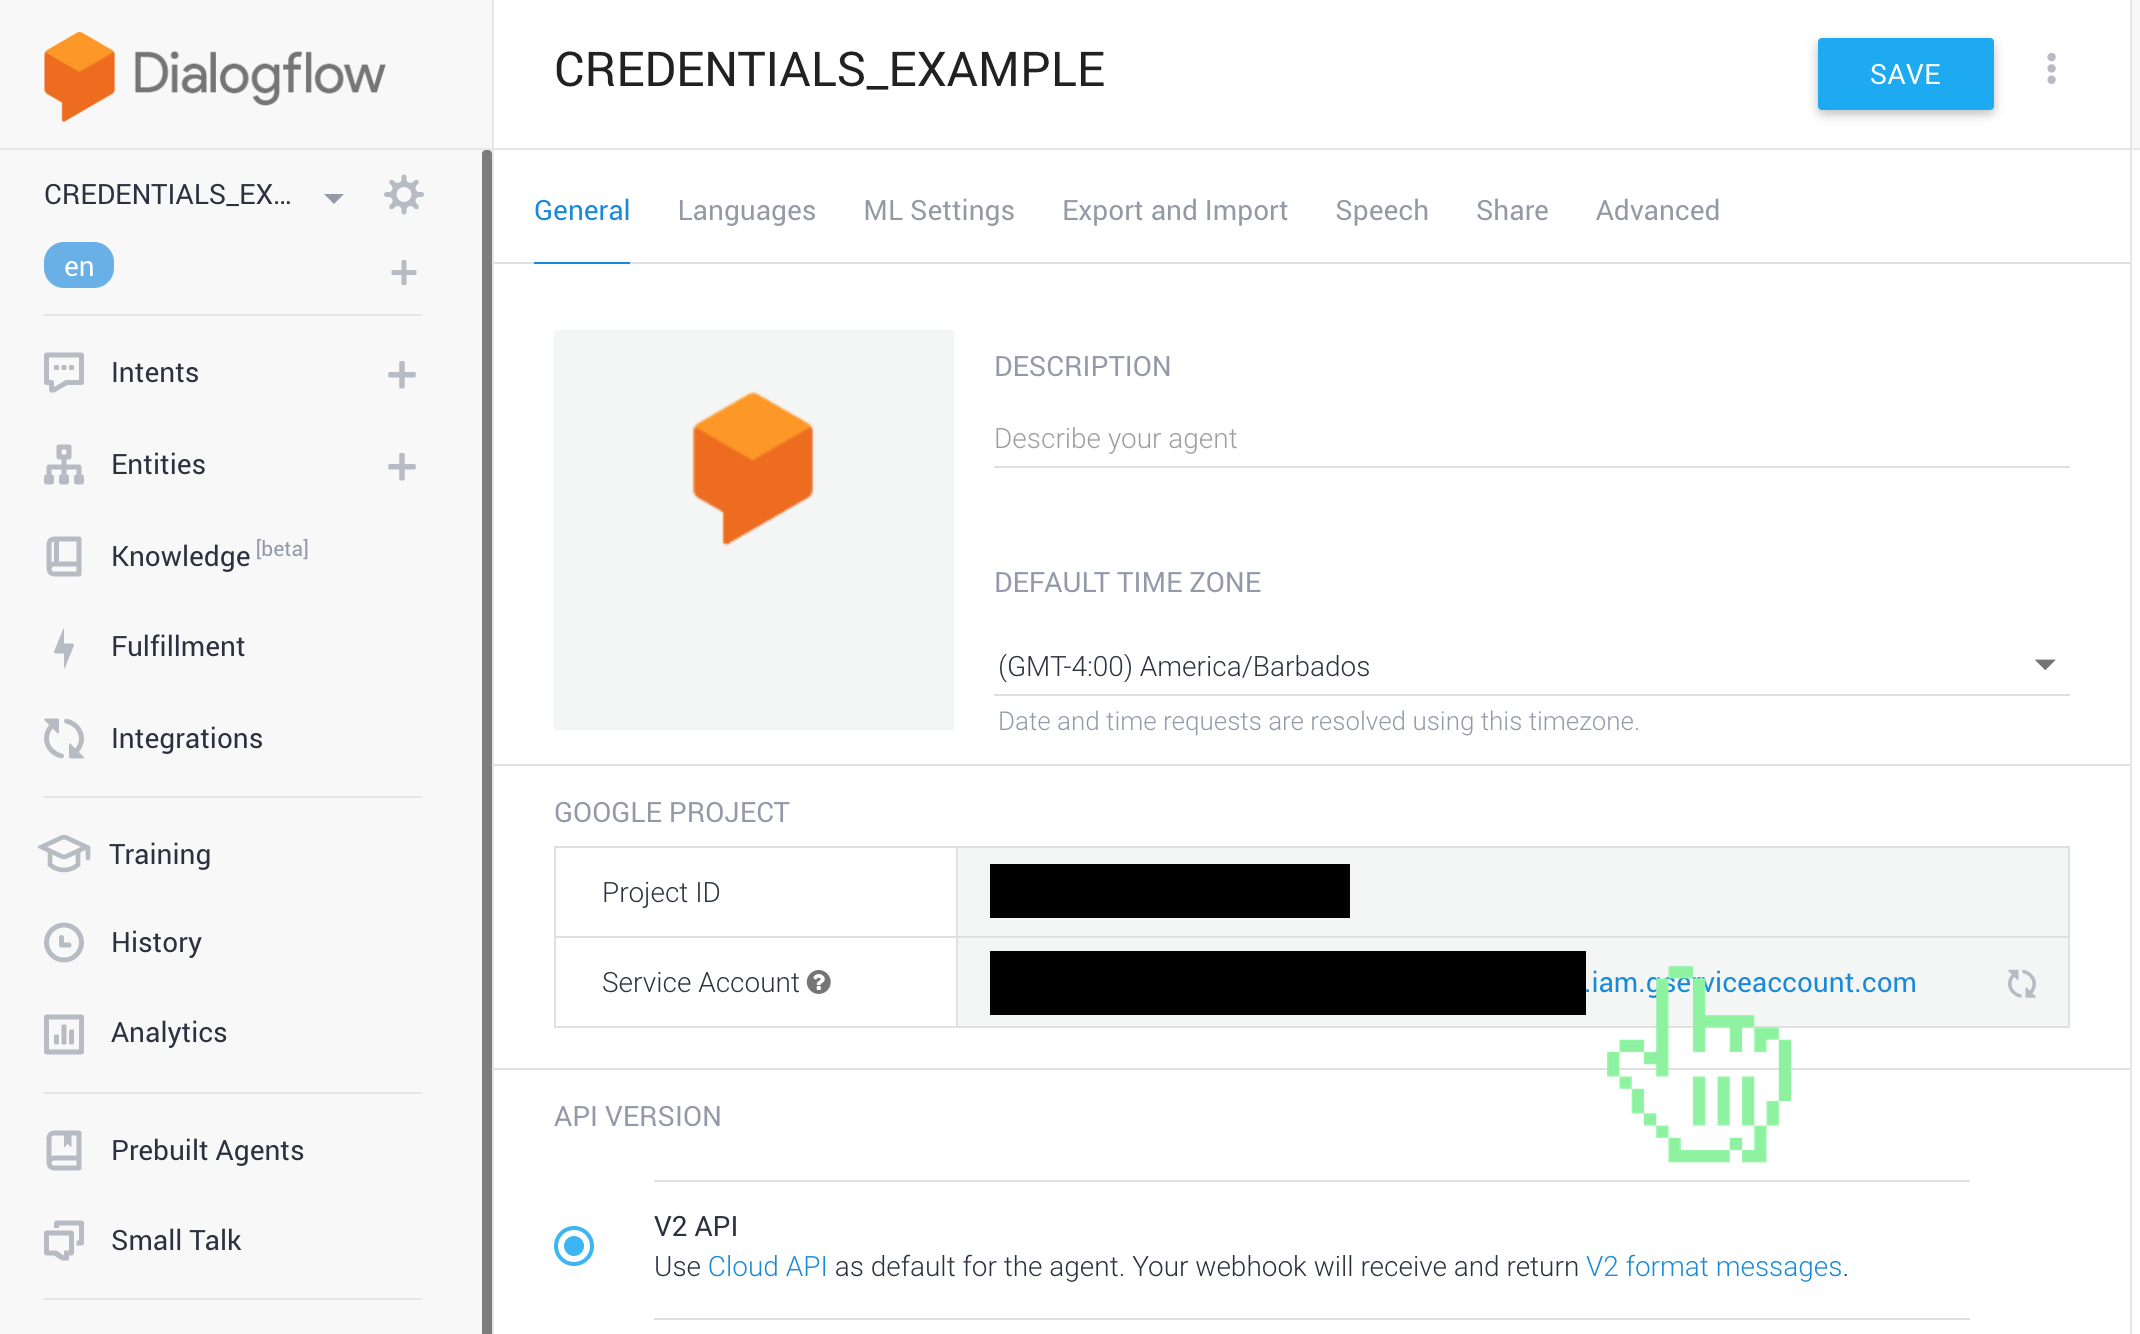
Note: If you don't see a service account email, click the "+" button to add one.
Once on the IAM & Admin page for the Dialogflow agent, click "Create Service Account"

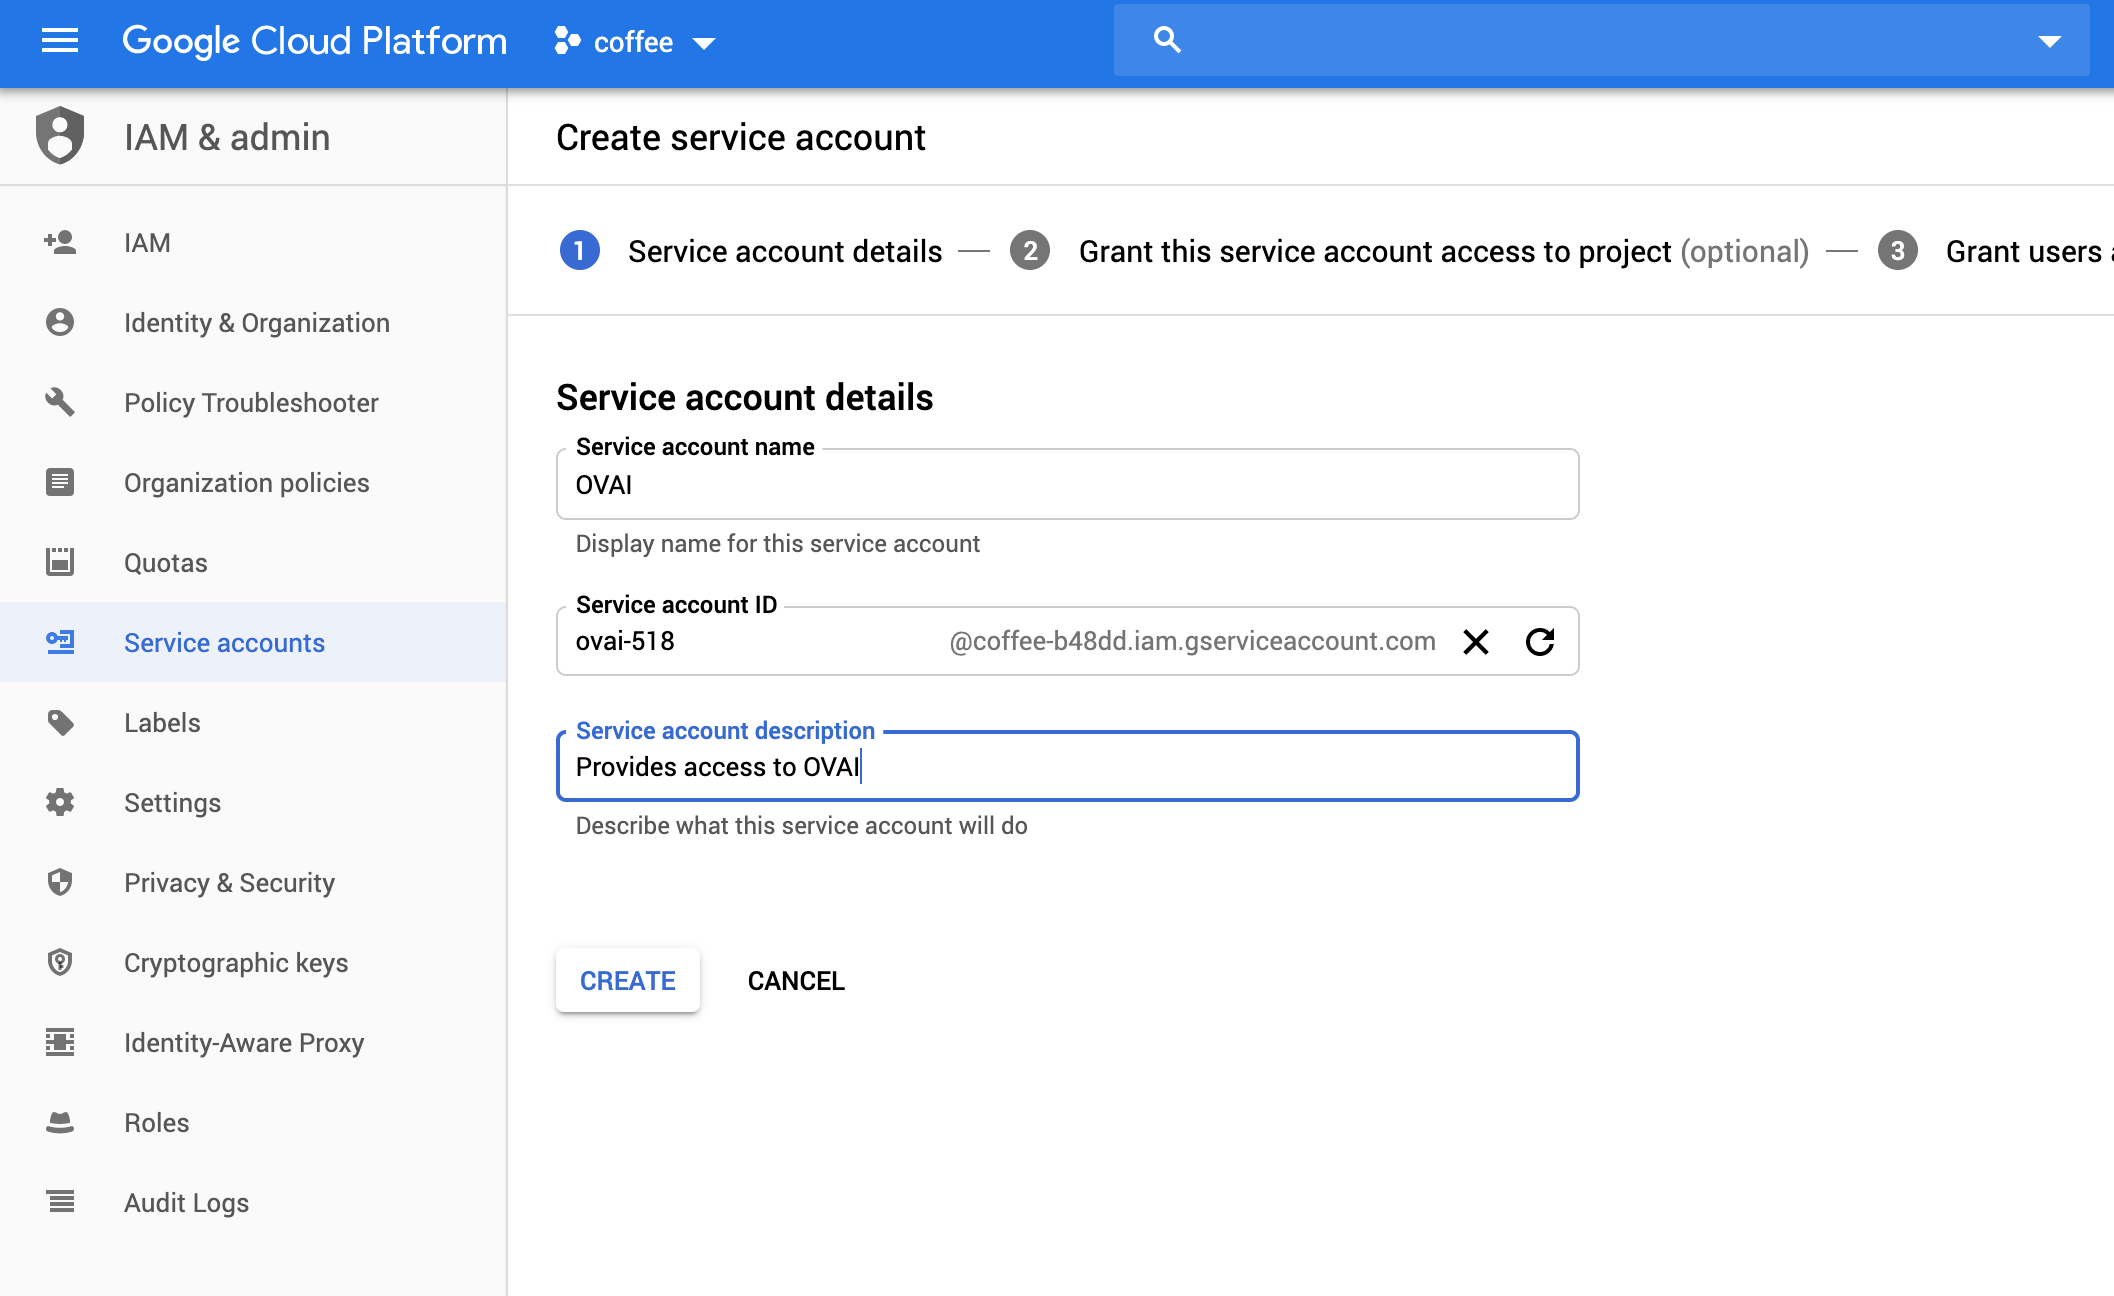
Enter a name and description for the service account and click "Create".
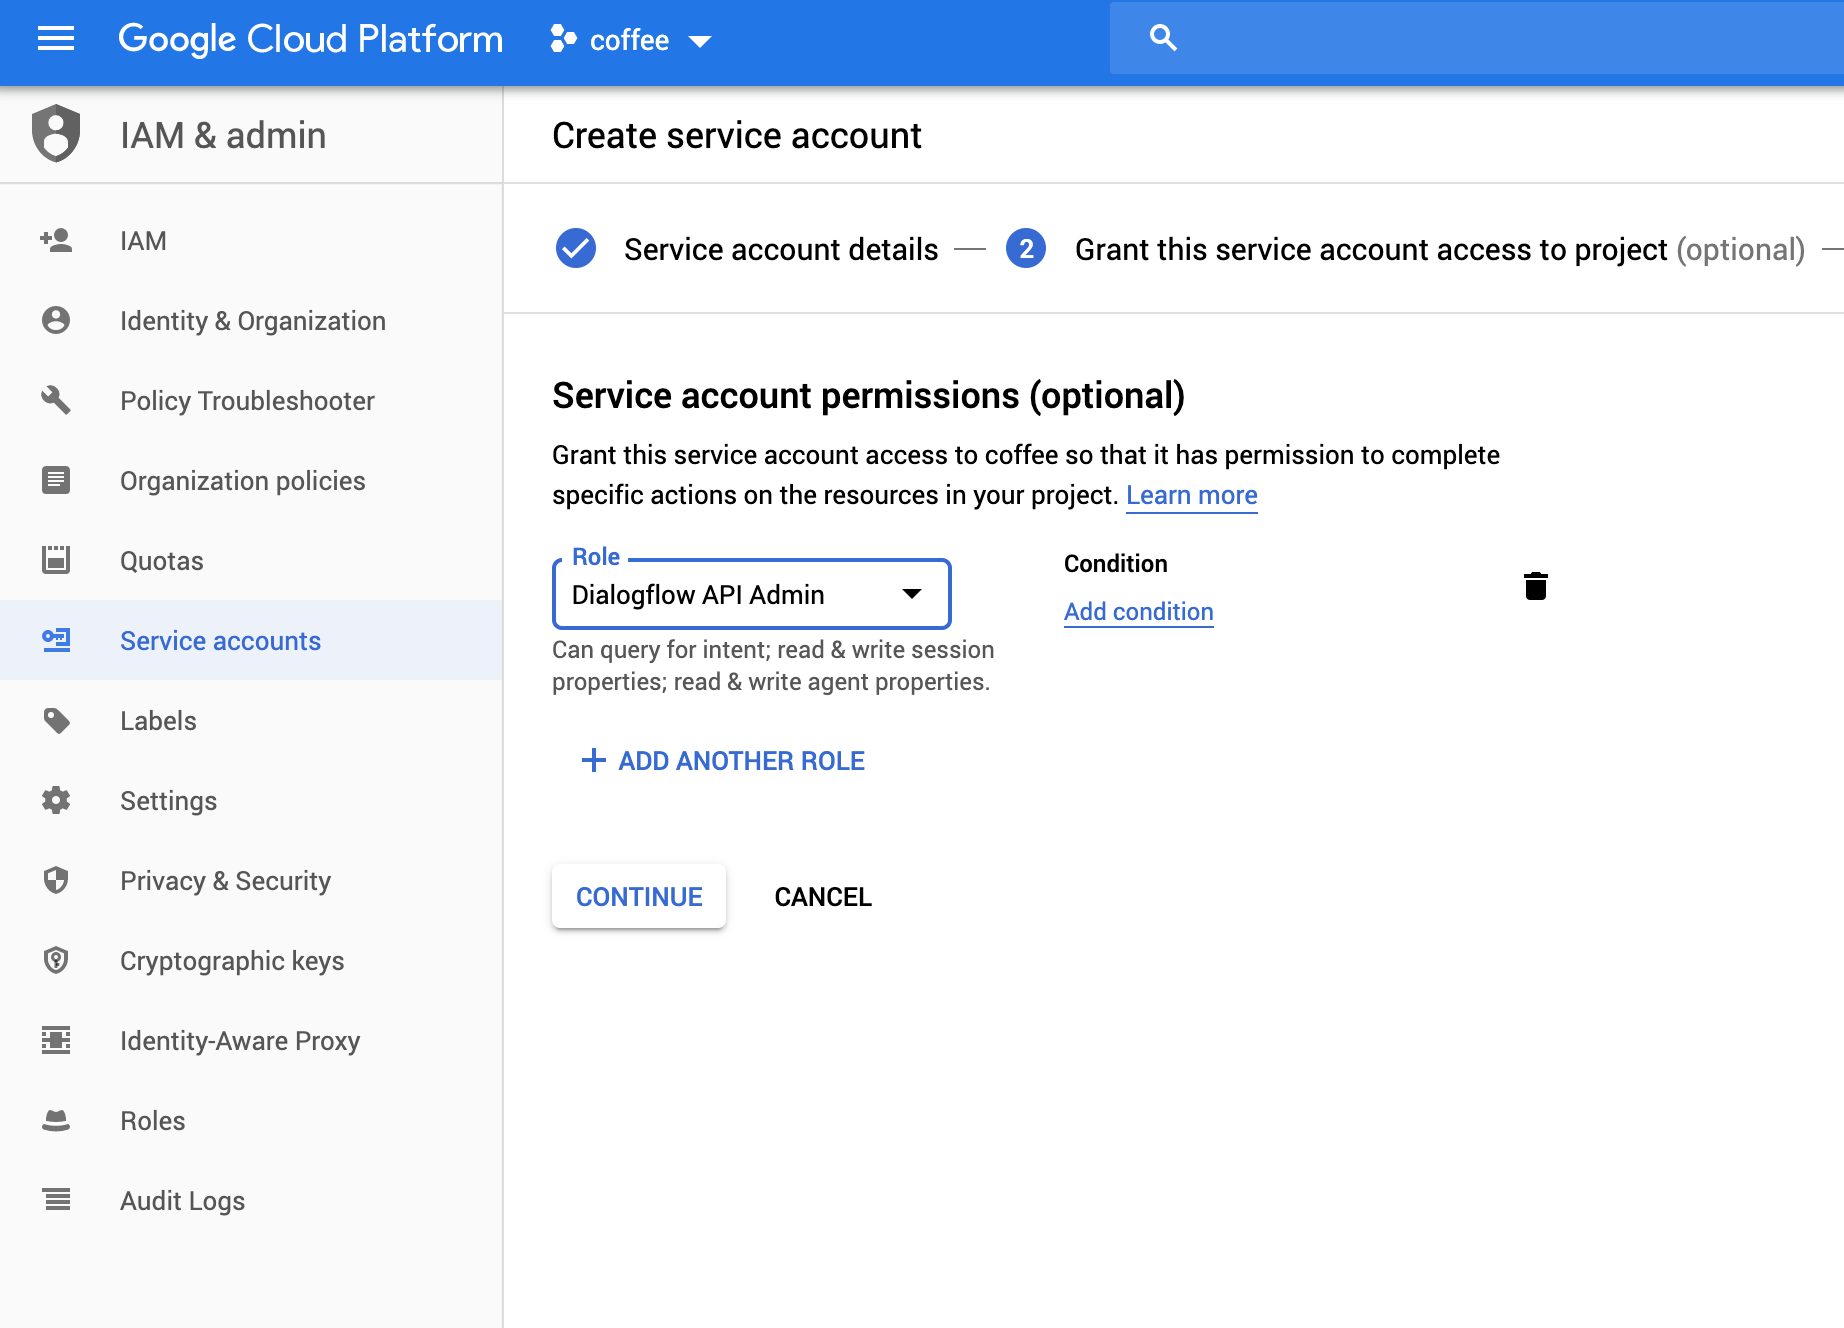
After you click create, you will be directed to the next page where you will set permissions. We will need the ability to both read but also write so we can update the interaction model. Click "Select a role" and then search for "dialogflow", select the "Dialogflow API Admin" role.
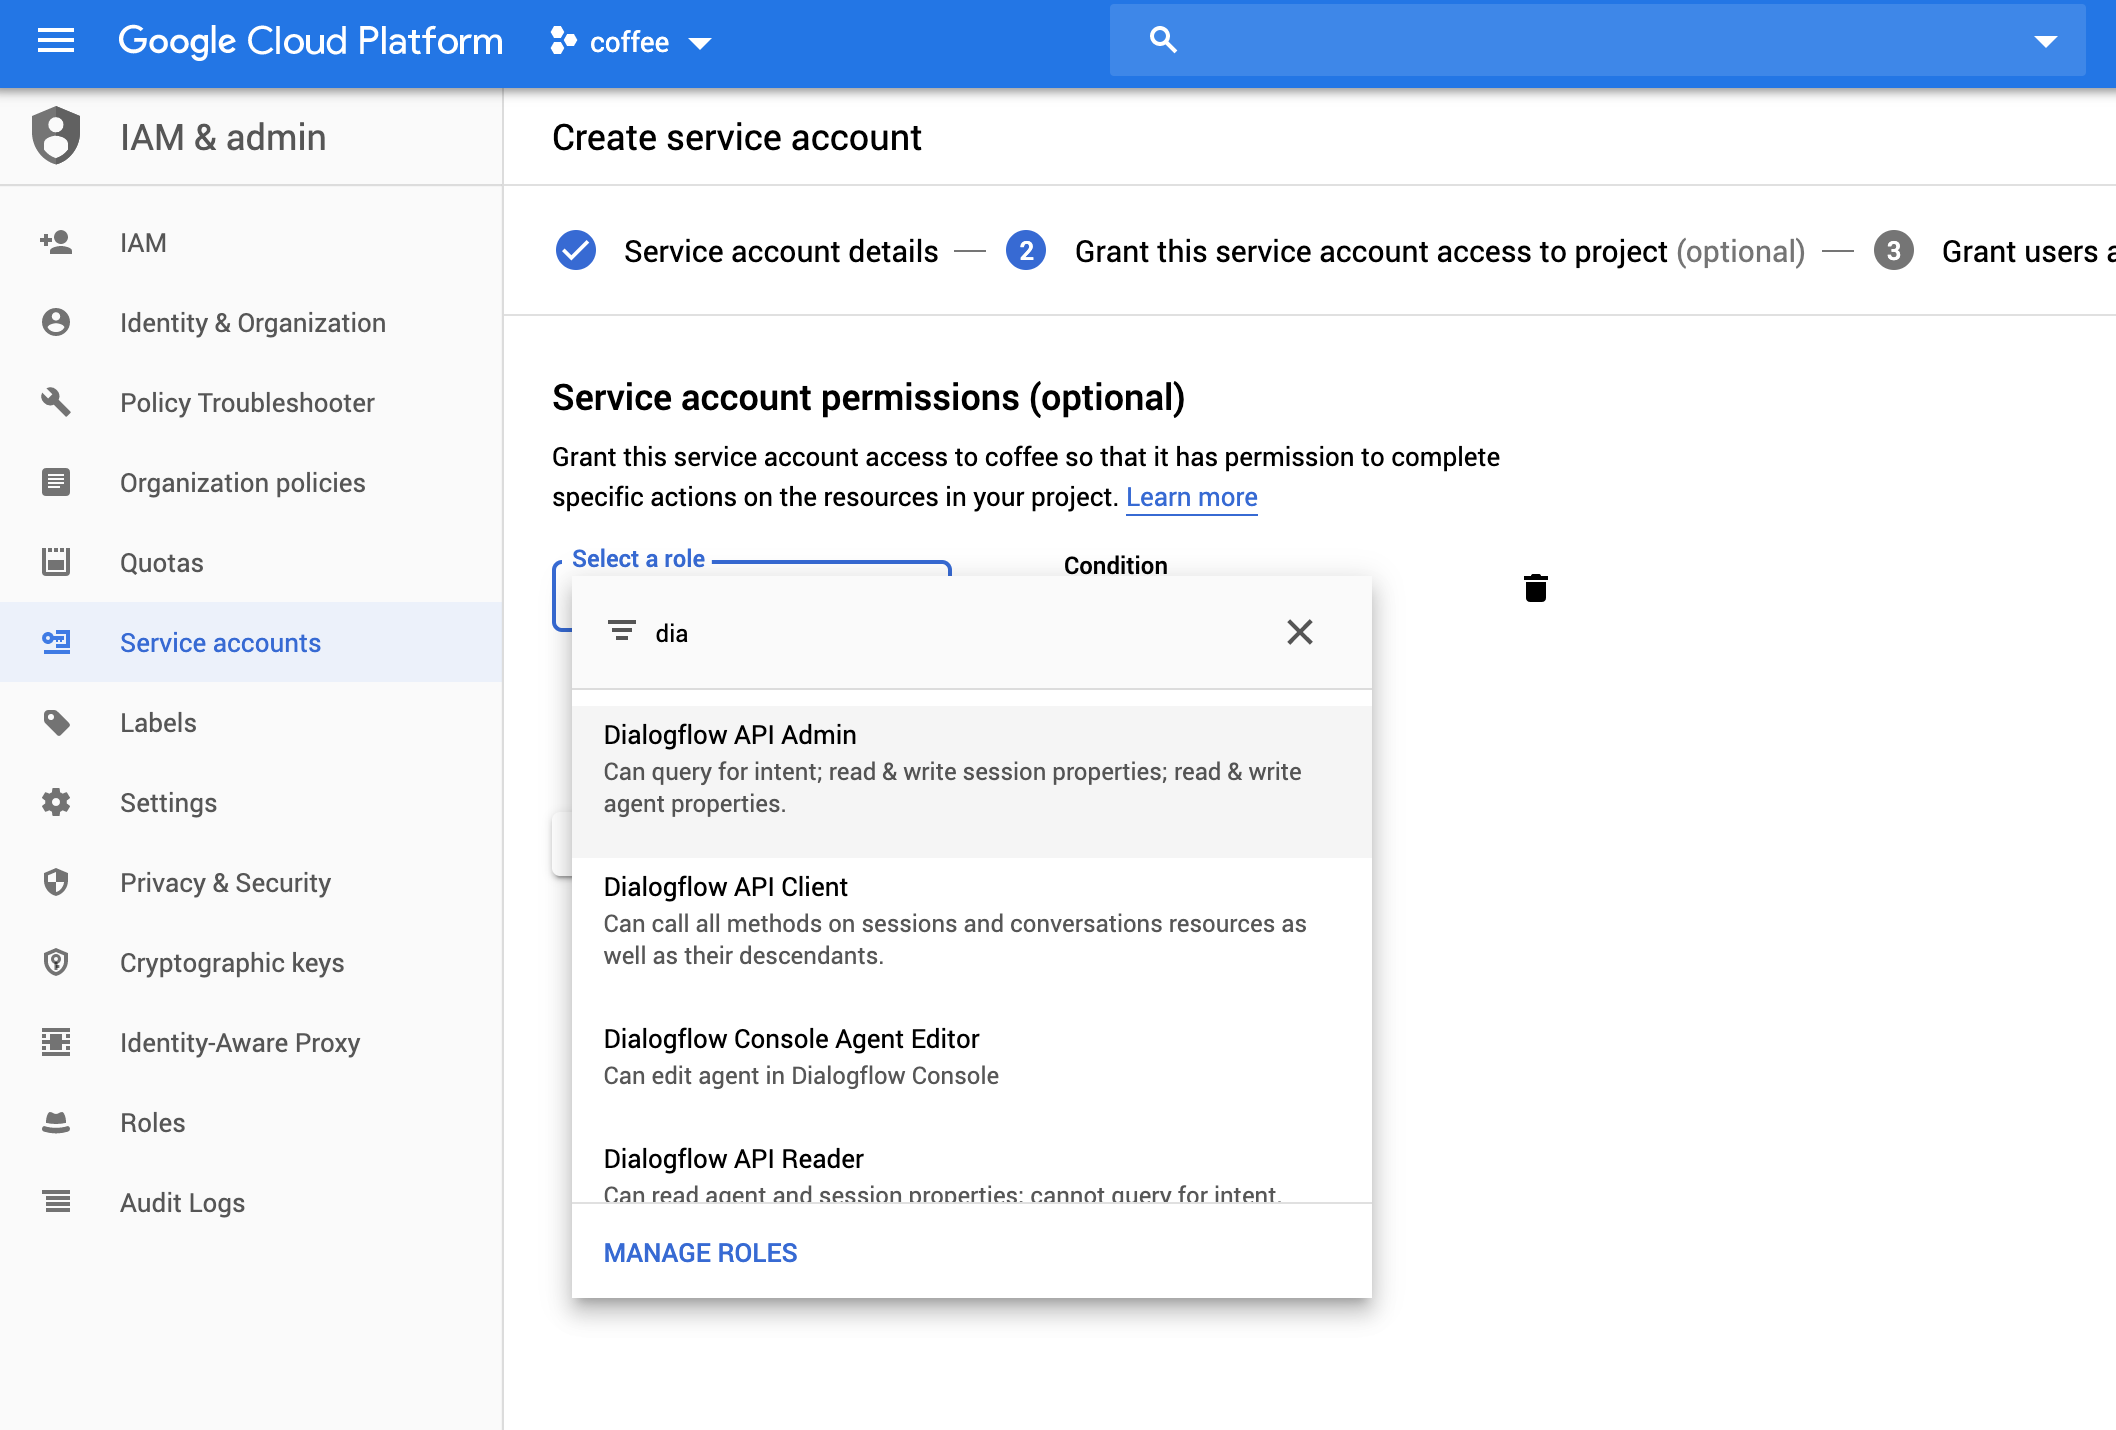
Once you select the role, click "Continue".
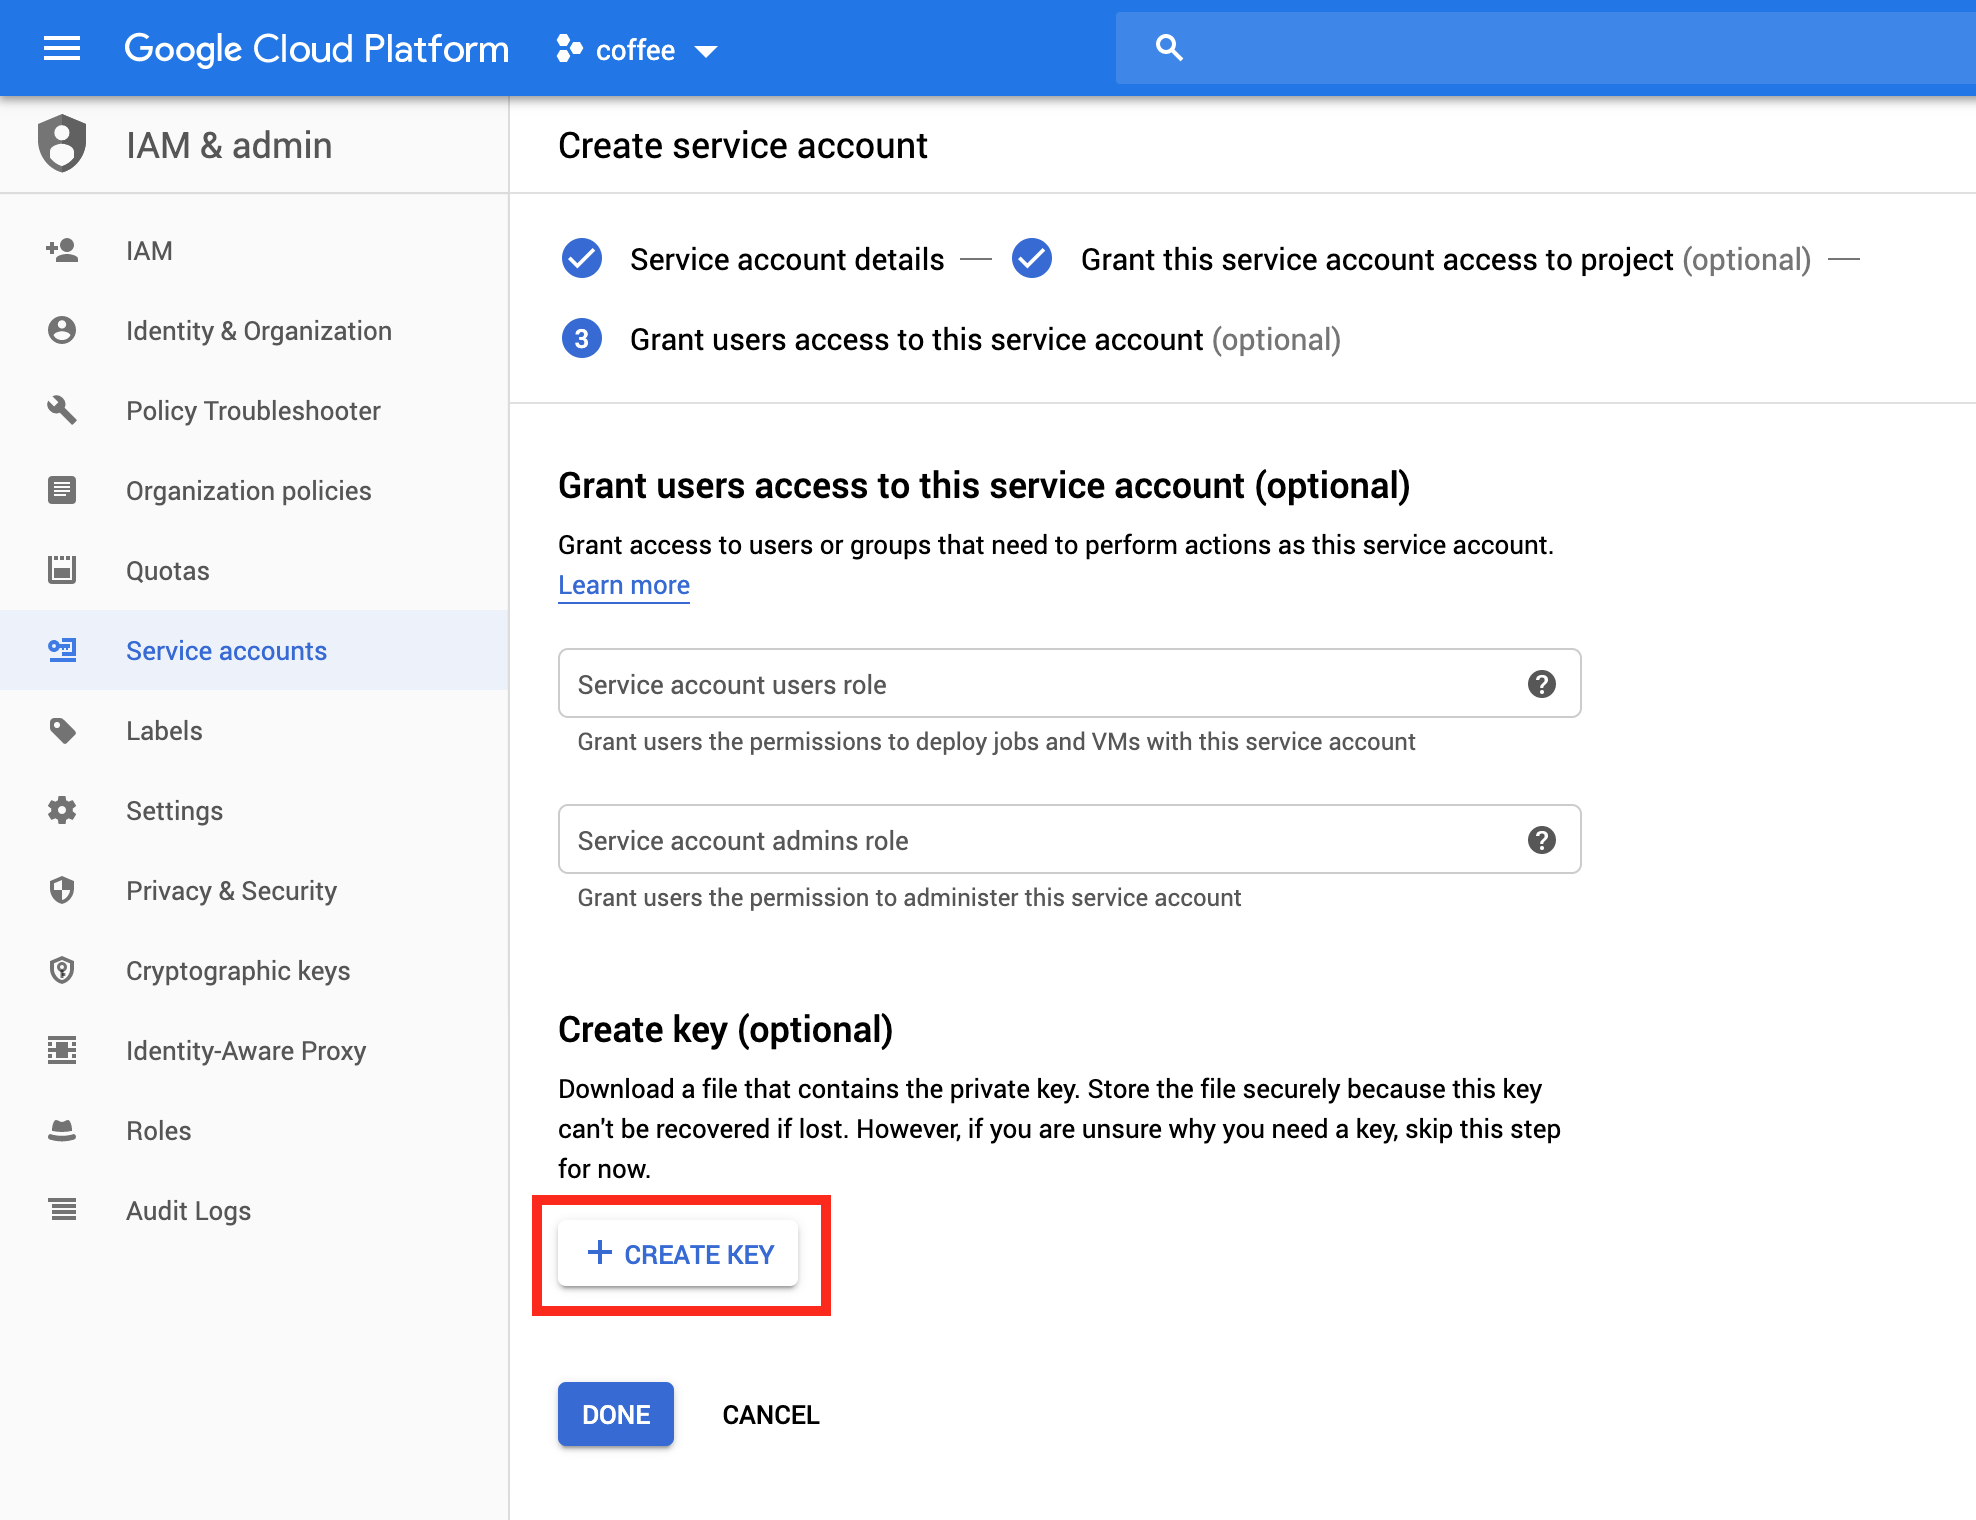
After clicking continue, you will now need to create an access key. Click "+ Create Key" right above the "Done" button.
A side window will appear on the right, select the JSON radio button and then click done.
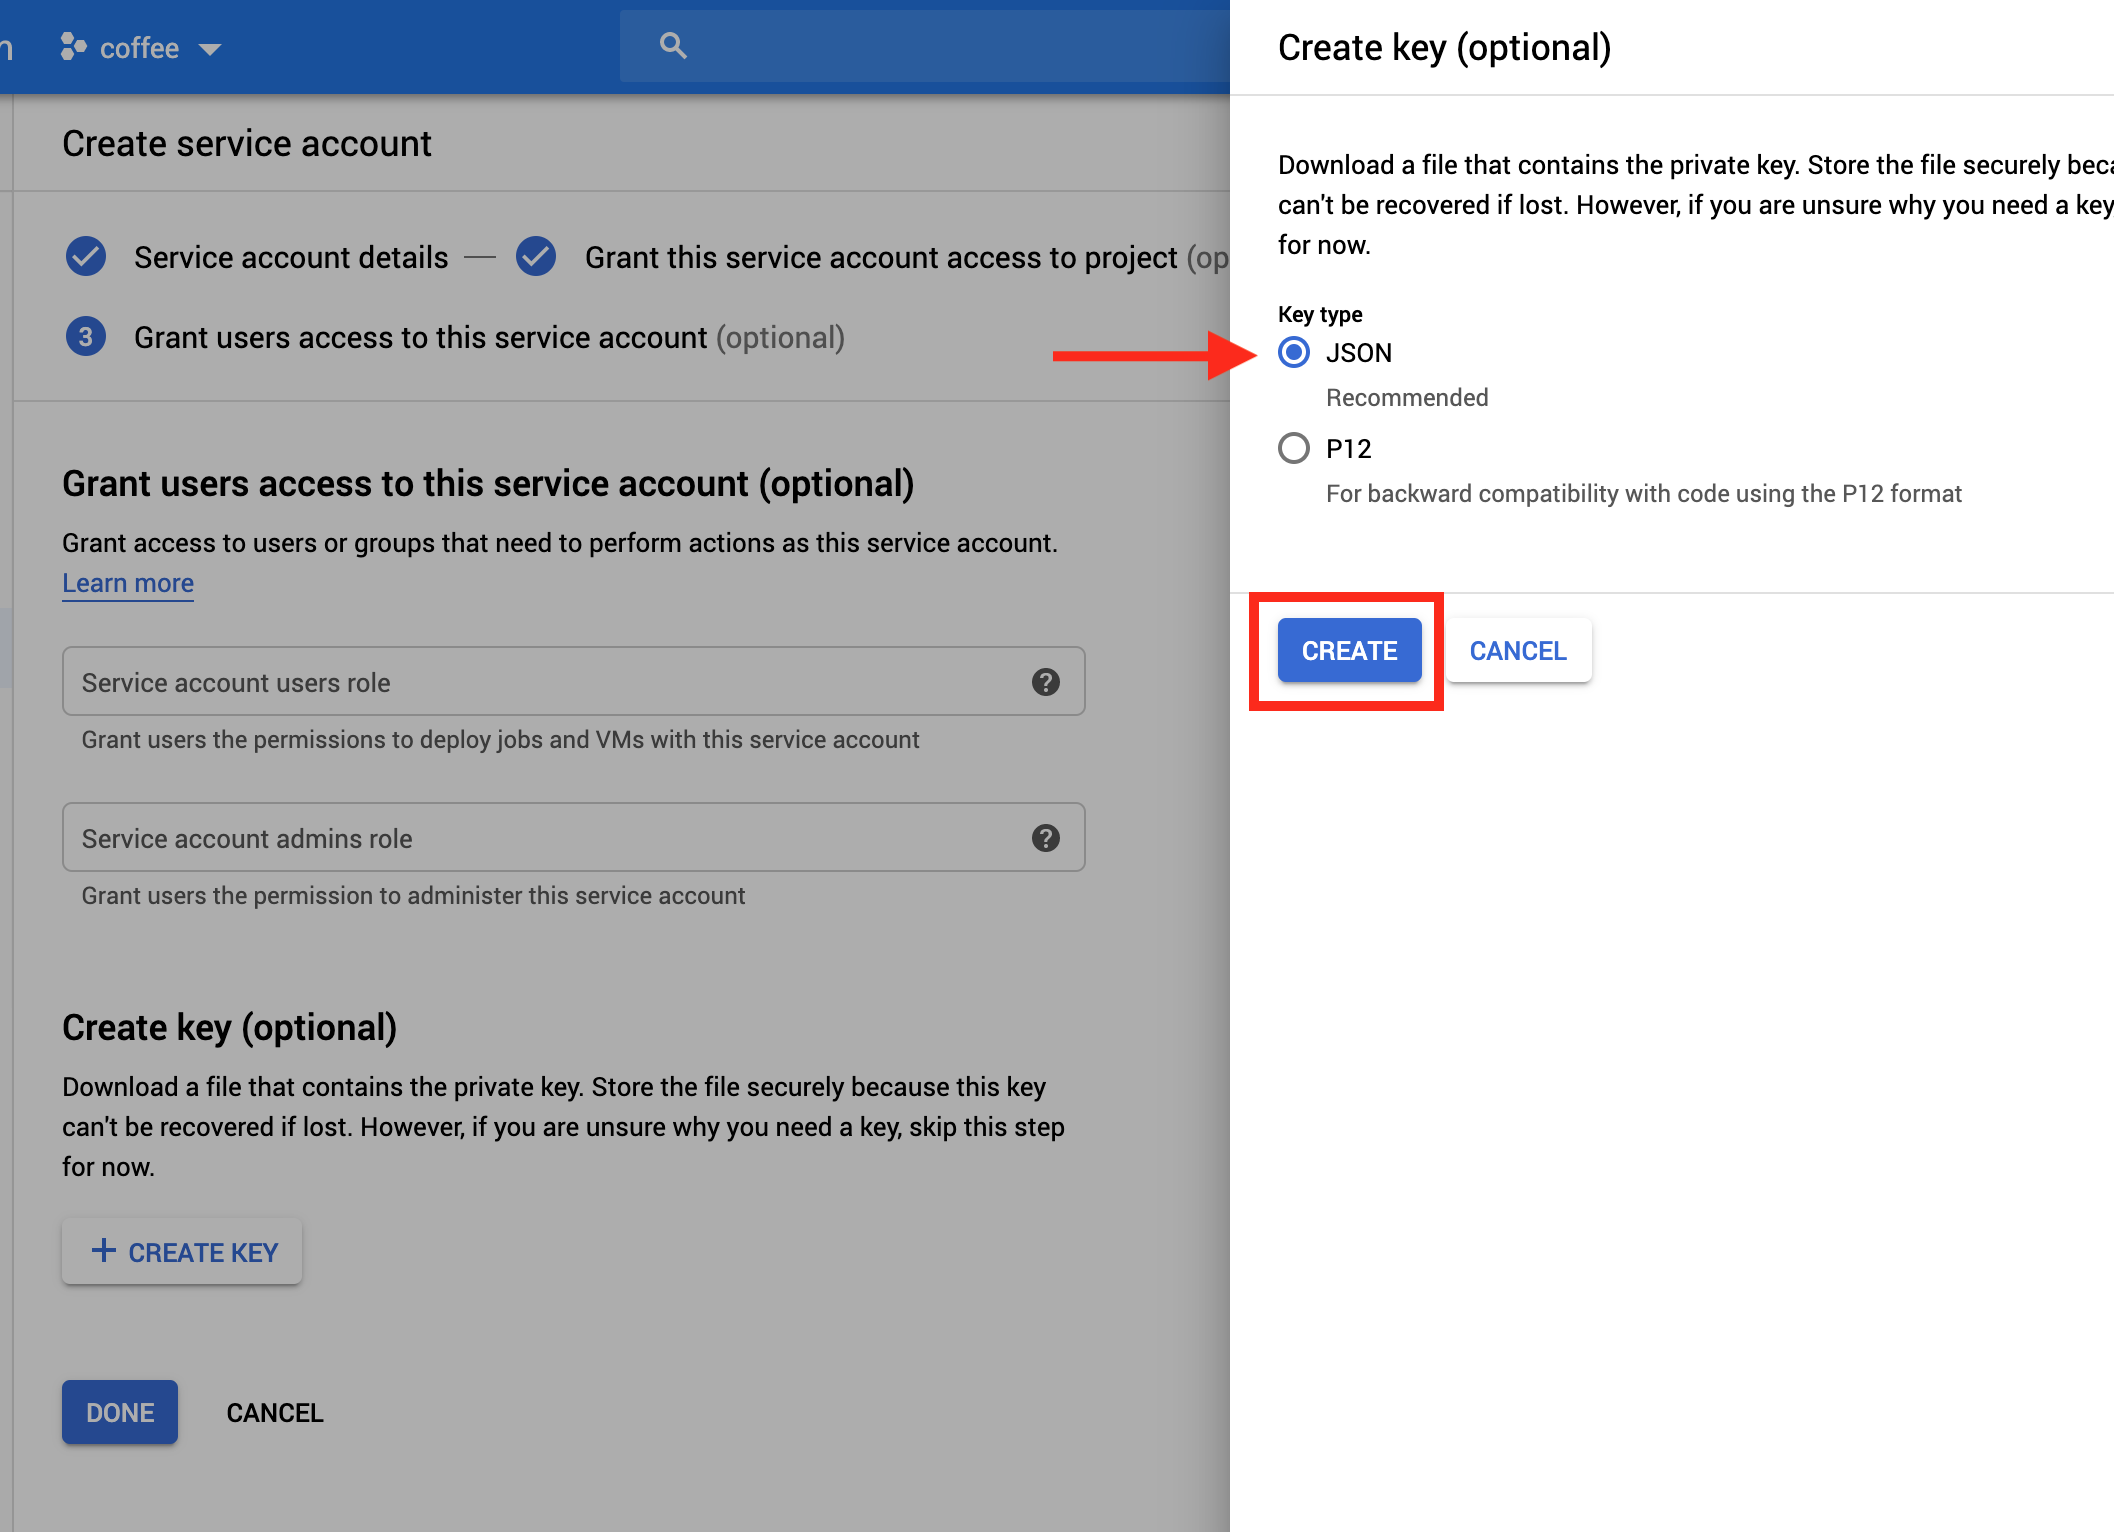
This will download a JSON file with your credentials. Use these to then upload to OVAI.
Comments
0 comments
Please sign in to leave a comment.